I did post on the wrong blog (is my another blog account) so the progress of mine will goes to this site
http://creativelyblogthewayiblog.blogspot.com/
Hope is not so troublesome for you all...
So So Sorry...
My Way.I Blog
Tuesday, April 5, 2011
Wednesday, January 12, 2011
The progress ????
Where is mine progress ???
Want to know???
There actually a simple job for me to finish up the calender,our group "just follow the template and replace the picture and date that. So simple right ^^
Check on our group blog for more progress on
http://cg2hb13003.blogspot.com/
Want to know???
There actually a simple job for me to finish up the calender,our group "just follow the template and replace the picture and date that. So simple right ^^
Check on our group blog for more progress on
http://cg2hb13003.blogspot.com/
My Calender
I was given that task on settling the month of June and August for the calender design on the country of Italy and Malaysia.
We made decision on putting Italy on June because the Formation of Republic in Italy fall on 2nd June 1946 and Malaysia on August because our national day fall on 31st August every year.This is how we locate our duty on our perspective month of each of us.
This two are my design on Calender 2011
Cheers ^^
The template
According to our discussion and consultation with lecture we finally come out with the template that post on our group blog http://cg2hb13003.blogspot.com/2010/12/second-improved-calender-template.html
this is the update on our template
(^^,)
this is the update on our template
(^^,)
Tuesday, November 16, 2010
Progress on finishing E-wallpaper
This is the second e-wallpaper I did for final hand in. Here are step that I take to finish this wallpaper.
 |
| Starting with a new file (A4 Size Resolution:300 pixel) |
 |
| Add image to Photoshop |
 |
| Paint bucket to fill background |
 |
| Crop image |
 |
| Insert to background |
 |
| Hue the Lantern |
 |
| Moon being added |
 |
| Level the color of the statue |
 |
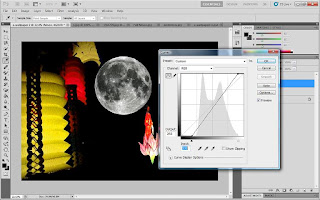
| Using Curve to adjust the moon |
 |
| Transparency on the mooncake background |
 |
| add another image |
 |
| Another image added |
 |
| Text added to the wallpaper |
 |
| This is my e-Wallpaper in JPEG |
Wednesday, November 10, 2010
First e-wallpaper
Sunday, October 31, 2010
Color Replacement Tool
Color Replacement Tool-The Color Replacement Tool was first introduced in Photoshop CS, and if you're using Photoshop CS or CS2, you'll find the Color Replacement Tool nested under the Healing Brush in the Tools palette. To access it, click and hold your mouse button down on the Healing Brush until a fly-out menu appears, then select the Color Replacement Tool from the menu.
I make my reference through http://www.photoshopessentials.com/photo-editing/color-replacement-tool/
My work place demo on this tool
This is how i work on with this tool
Will be starting my e-wallpaper soon ^^
I make my reference through http://www.photoshopessentials.com/photo-editing/color-replacement-tool/
My work place demo on this tool
 |
| Photoshop window |
 |
| Open file |
 |
| Choose image wanted to edit |
 |
| Choose Brush tool |
 |
| Left click on the small arrow to choose the color replacement tool brush |
 |
| Click on the option and start replace the color you wanted to replace |
 |
| taada...I have replace the bonnet color to green |
Will be starting my e-wallpaper soon ^^
Subscribe to:
Comments (Atom)


